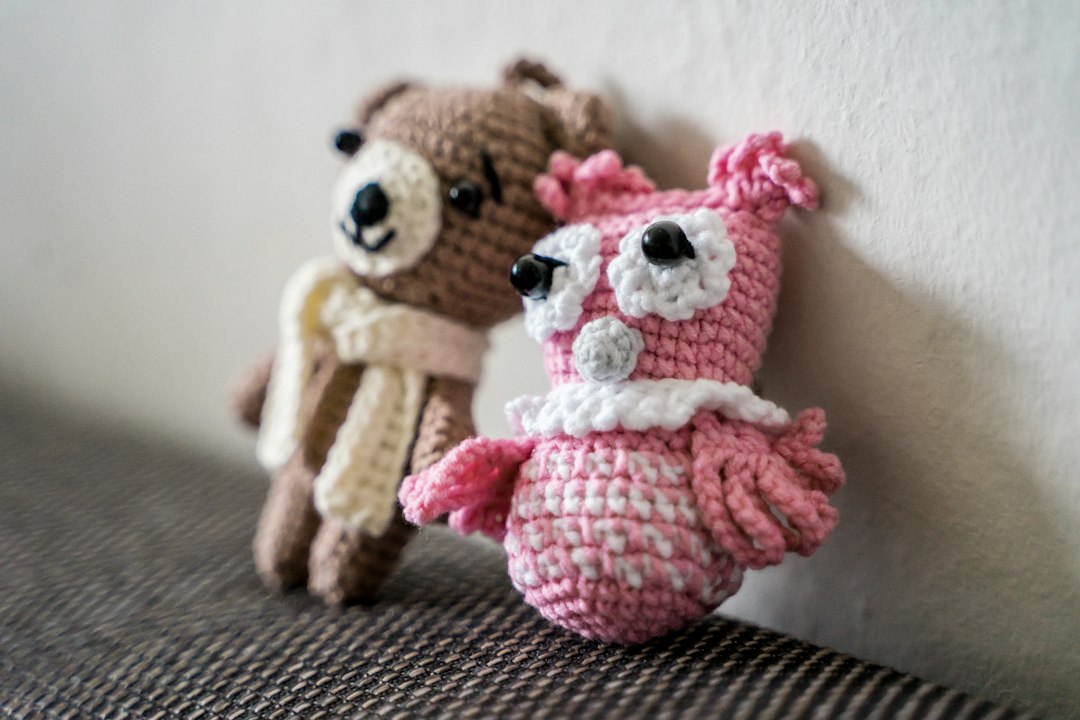
Why Learning How to Crochet Amigurumi Animals for Beginners Gets So Wrong—So Fast
Amigurumi—the Japanese art of crocheting small, stuffed yarn creatures—has exploded in popularity. From tiny foxes and sleepy owls to chibi-style elephants and penguins, these adorable projects seem deceptively simple. You find a pattern, grab some yarn, pick a hook, and boom: you have a plush toy.
But here is the brutal truth that most beginners discover the hard way: that first amigurumi animal rarely looks anything like the finished example in the pattern photo. The head is too pointy. The body sags. The limbs are uneven. The seams are visible and messy. Something about the proportions feels deeply off.
This article exists to save you from those frustrating, hours-wasted mistakes. We will walk through the five most critical errors beginners make when learning how to crochet amigurumi animals, explain exactly why each one happens, and give you practical, actionable solutions so your next project actually turns out exactly how you imagined it. Whether you are working with cotton, acrylic, or wool blends, these fundamentals apply universally—and ignoring them guarantees disappointment.
Mistake 1: Working Without a Stitch Marker (and Not Counting Your Rounds)
The Spiral Trap
Most amigurumi patterns are worked in continuous spirals rather than joined rounds. This means there is no visible seam between rounds—you simply keep crocheting around and around. Without a stitch marker, it is incredibly easy to lose track of where one round ends and the next begins. After twenty or thirty rounds of increasing, your brain starts to blur the boundary between round eight and round twelve. You might accidentally work two stitches into one area, creating an unsightly bulge, or skip a round entirely, causing the piece to develop a strange taper or gap.
I learned this the hard way on my third attempt at a crochet amigurumi rabbit. I had been counting on my fingers and kept losing my place because my yarn kept slipping out of my grip. When I finally completed the head, it had a noticeable ridge running around its circumference like a unwelcome extra seam. The entire piece looked lumpy and distorted. All because I could not track my rounds accurately.
The Solution
Invest in a set of locking stitch markers or simple split-ring markers—they cost less than a cup of coffee and will transform your work immediately. Place your marker in the first stitch of each new round and move it up as you complete each round. Alternatively, many crocheters mark their rounds manually with a piece of contrasting scrap yarn or even a small safety pin clipped into the stitch.
Beyond stitch markers, develop the habit of verbally counting or whispering your round number as you complete each one. It sounds unusual, but this simple practice keeps your mind actively engaged with the structure of your piece. When you increase, slow down and count each increase stitch deliberately. When you work even rounds, maintain steady momentum but do not let speed override accuracy.
Real-World Impact
A beginner who works without a stitch marker might produce an amigurumi head that is oval instead of round, has a pointed top instead of a smooth dome, or develops ridges and bumps that require extensive blocking and reshaping afterward. With a stitch marker and consistent round counting, your increases distribute evenly, your curves stay smooth, and your final shape matches the pattern design from the very first round.
Mistake 2: Using the Wrong Hook Size for Your Yarn
The Gauge Disaster
Hook size and yarn weight are inextricably linked, and getting this relationship wrong is one of the most damaging mistakes a beginner can make. Amigurumi requires tight, dense fabric. The stuffing lives inside the piece, and if your stitches are loose and loose-fitting, the stuffing will show through between stitches, creating an ugly, see-through mesh that completely undermines the illusion of a soft, plump creature.
Conversely, if you use a hook that is far too small for your yarn, the resulting fabric becomes rigid and nearly impossible to stuff properly. The closed stitches leave no room for filling, and the finished animal feels more like a hard plastic figurine than a cuddly toy.
Here is a clear comparison of what happens when hook size and yarn weight are mismatched:
| Yarn Weight | Recommended Hook Size | What Happens With a Hook Two Sizes Too Large | What Happens With a Hook Two Sizes Too Small |
|---|---|---|---|
| Sport (3) | 3.25–3.75 mm | Stuffing shows through; piece is floppy and loses shape | Fabric is stiff; difficult to stuff; needles may bend |
| Worsted (4) | 4–5.5 mm | Seams gape; overall shape sags under its own weight | Stiff and rigid; hard to decrease and close openings |
| DK (3) | 3.5–4.5 mm | Loose drape; pattern stitches distort visibly | Dense and hard to work through; hand fatigue increases |
| Aran (5) | 5.5–6.5 mm | Large visible gaps; piece looks ragged and unfinished | Nearly solid; extremely difficult to work with |
| Bulky (6) | 6.5–9 mm | Stitches stretch apart; loses all definition | Extremely dense; nearly impossible to manipulate |
The Solution
Always check the label on your yarn skein for the manufacturer's recommended hook size. Then, adjust downward by half a millimeter to one full millimeter if you are making amigurumi. This creates the tight, dense stitchwork that is essential for holding stuffing securely and maintaining clean, defined shapes.
Before beginning any new project, make a small gauge swatch—a ten-stitch by ten-row square worked in your chosen stitch pattern. Measure how many stitches and rows fit into four centimeters. If your gauge is looser than the pattern calls for, switch to a smaller hook. If your gauge is tighter, move up slightly. This single step prevents dozens of downstream problems.
Mistake 3: Stuffing Everything at Once at the End
The Lumpy Finish
There is a natural urge to rush through the crocheting phase and then deal with stuffing as an afterthought. You finish the body, finish the head, finish the ears, and then you grab your stuffing and begin shoving it in as quickly as possible. This approach almost always results in an uneven, lumpy product. Large pockets of dense stuffing sit next to empty voids. The head looks swollen while the body is underfilled. Limbs are firm in some areas and squishy in others.
The visual result is amateurish. Professional-looking amigurumi has a consistent, firm-yet-soft feel throughout, with smooth transitions from one body part to the next. Rush-stuffing destroys that balance entirely.
The Solution
Stuff progressively as you work. Begin inserting a small amount of polyester fiberfill as soon as your piece is large enough to reach inside. Distribute it evenly around the edges and center before closing anything. When working the head, add stuffing incrementally as the opening narrows, using a crochet hook or a blunt tool to push the fiberfill into corners and curves.
Pay special attention to structural integrity: the neck area where the head meets the body should receive slightly firmer stuffing to create a strong connection point. Limbs should be stuffed firmly enough to hold their shape but not so tightly that they become rigid. A good rule of thumb is to press the piece gently—it should resist slightly but still have a soft, yielding quality.
Also consider using cotton batting or foam pieces for small, detailed areas like paws, ears, or tails where loose fiberfill tends to shift and clump over time.
Mistake 4: Closing the Opening Improperly
The Gap of Shame
One of the most defining moments in any amigurumi project is closing the final opening. Beginners frequently make one of two errors: they pull the closing yarn too tightly, creating a deep, unsightly dent in the fabric, or they leave the opening too wide, resulting in a visible gap that exposes the stuffing inside. Both outcomes look unfinished and signal to anyone who knows crochet that this was a first attempt.
The problem often stems from a lack of familiarity with the drawstring closure technique. Many beginners simply pinch the opening shut and whip-stitch it closed with a yarn needle, which does not create a clean, gradual closing. Instead, the fabric bunches up dramatically at a single point.
The Solution
Use a tapestry needle threaded with a long strand of the same yarn (approximately twice the circumference of the opening). Insert the needle through the front loops only of the final round's stitches, going in and out in a consistent direction around the entire opening. Once all stitches are threaded, gently pull the tail to gather the opening closed. Make several passes, tightening incrementally rather than all at once.
When the opening is nearly closed, you may need to weave the yarn back through a few stitches in the opposite direction to redistribute tension and smooth out any remaining bumps. Finally, secure the yarn with a few small internal knots and weave in the end completely inside the piece so it is invisible from the outside.
For extra-smooth closures on rounded pieces like heads, consider using the invisible decrease technique throughout the final three to four rounds before closing. This produces a nearly seamless finish that is virtually undetectable.
Mistake 5: Ignoring the Pattern Instructions and Gauge
The DIY Detour
Patterns are written with mathematical precision. Every increase, every decrease, every round count has been calculated to produce the specific shape the designer intended. When beginners ignore these instructions—skipping rounds, changing increase schedules, substituting materials without adjustment, or working to a different gauge—the resulting piece diverges significantly from the expected outcome.
Consider a beginner making an amigurumi bear. The pattern specifies twenty-four increases distributed across eight rounds to form a perfect hemisphere. The crocheter decides to do all twenty-four increases in just four rounds instead, reasoning that it will save time. The resulting head is flat and wide rather than round and domed. No amount of stuffing or shaping afterward can fix a foundational geometry error.
The Solution
Read the entire pattern from start to finish before you make a single stitch. Take note of the recommended yarn, hook size, stuffing type, and finishing instructions. Understand the shaping logic: where the increases create curvature, where the decreases close openings, and where the even rounds build length or volume.
If you need to substitute materials, calculate the new gauge carefully. Switching from worsted-weight yarn to DK-weight yarn without adjusting your hook size will change the stitch density and alter the final dimensions of your piece. Similarly, switching from a cotton blend to an acrylic yarn may affect how the fabric behaves when stuffed and shaped.
Never skip reading the finishing section either. Many beginners complete the crocheting perfectly and then fumble through assembling the pieces because they did not note the recommended order of operations, seam placement, or embroidery details specified at the end of the pattern.
Mistake 6: Rushing the Assembly and Finishing Details
The Quick-and-Dirty Shortcut
Once all the individual pieces are crocheted and stuffed, the assembly phase begins. This is where many beginners cut corners. They sew pieces together hastily, leaving visible gaps and crooked seams. They skip embroidering facial features entirely, leaving their amigurumi with a blank, expressionless face. They attach limbs with only a few stitches, creating weak connection points that will fail during normal handling.
The finished piece may be structurally complete, but it will lack the polished, professional appearance that distinguishes a well-crafted amigurumi from a rushed hobby project.
The Solution
Assemble methodically. Begin by pinning or lightly basting each piece into its correct position before sewing. Use a matching yarn or a contrasting thread for visible seams, depending on your design intent. For limbs and ears, work multiple passes with the needle to create secure, durable attachment points. Test each connection by gently tugging before you consider it finished.
Facial features matter enormously for character. Embroider eyes with sufficient stitches to create depth and shine—many makers use a satin stitch or French knot for a three-dimensional effect. Add a small white highlight stitch if you want the eyes to appear glossy and lifelike. Nose and mouth embroidery should be proportionate to the size of the face; a tiny stitched triangle works beautifully for a small mouse, while a larger embroidered oval suits a bear.
Take your time with finishing. This phase is where your amigurumi transforms from a collection of crocheted parts into a cohesive, charming creature.
Mistake 7: Not Understanding Tension Consistency
The Rollercoaster Stitch
Tension—the consistency with which you pull yarn through each stitch—is one of the most overlooked factors in successful amigurumi. Beginners often have variable tension: some stitches are snug and tight, others are loose and floppy. This inconsistency creates an uneven surface texture, distorts the overall shape, and makes it difficult to predict how the finished piece will look.
Inconsistent tension is particularly damaging when working increases and decreases. A loose increase stitch creates a hole, while a tight decrease stitch pulls the surrounding fabric inward unnaturally. Over the course of a full project, these small variations accumulate into significant shape distortions.
The Solution
Practice maintaining even tension by consciously relaxing your grip on the yarn. Do not tug each stitch as tightly as possible, and do not let the yarn go completely slack. Aim for a middle ground where each stitch sits neatly next to its neighbor without gaps or compression.
Work slowly and deliberately, especially in the early rounds where shaping determines the overall form. If you notice your tension becoming inconsistent during a long session, pause, take a few deep breaths, and refocus before continuing. Many beginners find that switching from a smooth acrylic yarn to a textured cotton yarn helps them become more aware of their tension because the fabric feels more rigid and immediate feedback is more apparent.
Mastering the Fundamentals: Your Path Forward
Learning how to crochet amigurumi animals for beginners does not require innate talent or years of experience. It requires awareness of the common pitfalls and a commitment to addressing them head-on. The seven critical mistakes covered in this article represent the most frequent sources of frustration, failed projects, and abandoned hobbies in the amigurumi community.
By using stitch markers and counting your rounds, selecting the correct hook size for your yarn, stuffing progressively and evenly, closing openings with proper technique, following patterns faithfully, assembling with care and precision, and maintaining consistent tension, you build a foundation that supports every future project. Each mistake avoided is a skill gained. Each correction applied is a step toward confidence.
Your next amigurumi animal does not have to be another disappointing experiment. Armed with these troubleshooting strategies and real-world solutions, you are equipped to create stuffed creatures that are well-shaped, securely constructed, and genuinely beautiful. Pick up your hook, choose your yarn, and start crocheting with intention.