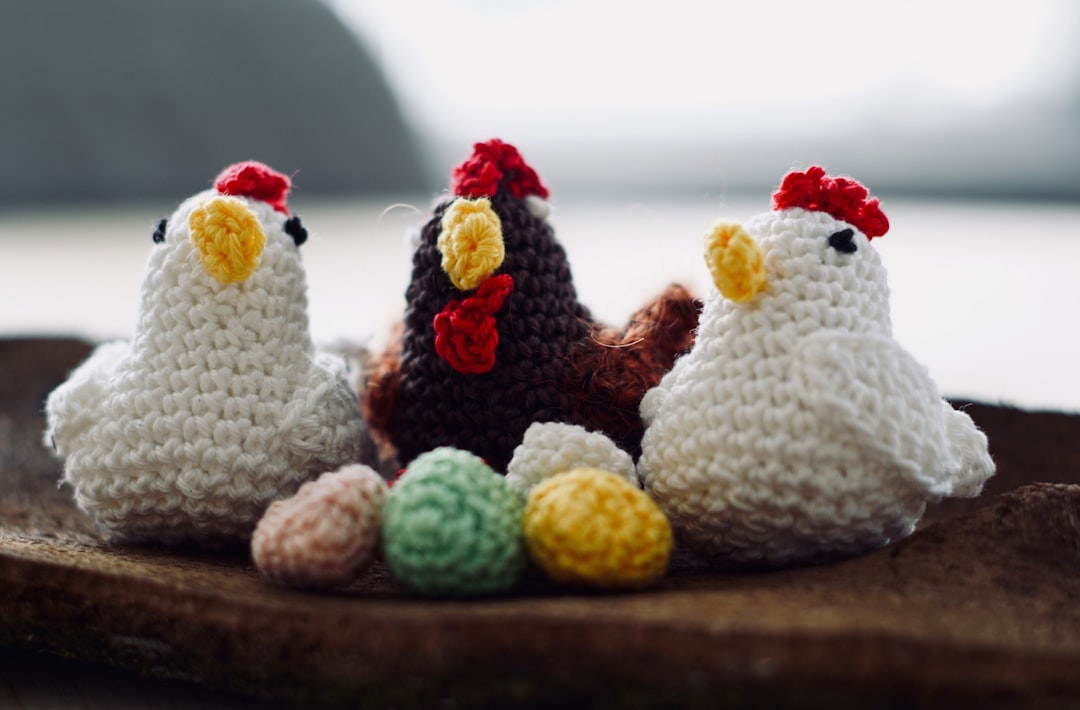
Why Crocheting Amigurumi Animals Feels Daunting at First
Amigurumi is the Japanese art of crocheting or knitting small, stuffed yarn creatures. The practice has exploded in popularity over the past decade, with creators around the world sharing free patterns across blogs, YouTube, and social media platforms. For beginners, the appeal is obvious: you create adorable characters like bears, rabbits, foxes, and frogs using only two basic stitches — the single crochet and the increase. On paper, that sounds simple. In practice, many newcomers encounter frustration within their first project.
The gap between expectation and reality usually comes down to a handful of repeatable issues. Most beginner amigurumi projects end up with visible gaps between stitches, lopsided ears, overly stiff or floppy bodies, and stuffing that shows through the fabric. These are not signs that you lack talent. They are symptoms of well-documented technique errors that can be corrected with targeted adjustments. This guide walks through every major problem beginners face when learning how to crochet amigurumi animals, explains why each one happens, and gives you step-by-step fixes you can apply immediately.
Tension and Stitch Tightness: The Foundation Problem
The single most important factor in successful amigurumi is stitch tension. Your fabric needs to be tight enough that the crochet stitches lay flat against each other without leaving holes where poly-fil stuffing can escape. This requirement immediately creates a tension paradox for most beginners because the yarn label recommends a larger hook size than what works for amigurumi.
Most worsted weight yarns suggest a hook size between 5.5 millimeters and 6.5 millimeters. However, when working amigurumi, the general recommendation is to use a hook two sizes smaller than the yarn label suggests. If your yarn label calls for a 5.5 millimeter hook, you should use a 3.5 millimeter or 4 millimeter hook instead. The smaller hook creates tighter loops, tighter tension, and a denser fabric.
If your first attempt already has visible gaps between stitches, here is what to do. Switch to a smaller hook size immediately. This alone will resolve the majority of hole-related problems. Practice maintaining consistent tension across your work by holding the yarn at a steady, moderate grip. Do not tug aggressively on the working yarn after each stitch, and do not let it go completely slack. You want even pressure, not extremes on either side. Many crocheters discover that switching from a plastic or aluminum hook to a glass or polished metal hook improves control because the smoother surface glides more predictably under tension.
Another tension variable worth examining is how you carry your yarn. Some crocheters hold the yarn over their index finger wrapped tightly, while others drape it loosely across the fingertip. The looser wrap typically produces a gentler, more even tension better suited to amigurumi. Experiment with both methods until you find the one that gives you control without creating uneven stitch sizes.
The Test: Can You See Through Your Stitches?
A reliable quick test for proper tension is to hold your finished swatch up to a bright light source. If you can clearly see lines of light passing through the gaps between stitches, your fabric is too loose. Proper amigurumi fabric should block almost all light. A small amount of透光ivity is acceptable in the early rounds but should decrease as you work further into the body of your animal.
Lost Round Count: The Silent Pattern Destroyer
Losing track of your round is perhaps the single most common beginner mistake in amigurumi. It happens during increases, when you forget whether you are working in an increase round or a regular round. It also happens during decreases, when stitches merge together and counting becomes visually confusing. The result is almost always a misshapen object: a head that tapers at the wrong point, an ear that curves inward, or a body that bulges unexpectedly.
The solution requires both tools and discipline. First, use a removable stitch marker in one of the first stitches of every round. Move the marker up one position each time you complete a round. Locking ring stitch markers work best because they slide smoothly along the yarn without catching. Magnetic stitch markers are another excellent option for those who find clip-on markers frustrating to manipulate.
Second, supplement your physical marker with a digital round counter. Smartphone apps and small handheld clickers are inexpensive and highly reliable. Every time you finish a round, you click the counter. This gives you an objective record of your progress that you can check at any moment without stopping to examine the work closely.
Third, learn to read your pattern intelligently. Patterns are written with increasing specificity as rounds progress. A typical shape follows a sequence like this: round one establishes the magic ring, rounds two through four contain increases to create a circle, round five begins tapering with no-increase rounds, and round six starts decreasing. Recognizing these structural phases helps you mentally anticipate where you should be. If you finish a round and realize you cannot locate the marker, stop and carefully inspect the last three rounds before continuing. This pause prevents compounding errors deeper into the project.
Stuffing Errors: Overstuffing, Understuffing, and Lumps
Proper stuffing determines whether your amigurumi looks polished or homemade in an unrefined way. Beginners often make two opposite mistakes. They either overstuff the piece in an attempt to make it firm and presentable, or they underfill it, resulting in a saggy, shapeless creature that cannot stand upright. Both errors stem from misunderstanding how amigurumi fabric behaves under pressure.
Overstuffing stretches your stitches outward. It creates a rounded, balloon-like appearance and forces the stitches apart so they separate visibly even in previously tight fabric. An over-stuffed bear might look plump for a few hours, but it will sag over time as the stretched yarn relaxes. It will also lose its intended anatomical proportions.
Understuffing leaves limbs floppy and ears lifeless. A crocheted elephant ear that should stand straight will droop completely if there is not enough internal support. The fix is not simply more stuffing, though. You need firm but controlled distribution.
The professional approach uses small amounts of polyester fiberfill applied gradually. Start by filling narrow extremities first, such as legs and arms, using a poking tool like chopsticks, a safety-pin eraser tip, or a specialized stuffing tool. Push the fiberfill into the narrowest point and work outward slowly. Never forcefully pack large clumps into a limb. Instead, add thin layers, pressing gently with the tool after each addition. For the main body, fill more liberally but maintain even density throughout.
When stuffing the head or torso, stop periodically and press the exterior shape with your fingers to confirm symmetry. If one side appears fuller than the other, adjust by redistributing rather than adding more material. The goal is a firm, resilient sculpture that holds its form under gentle pressure, not an inflated pillow.
Filling the Face Before Closing
A common procedural error involves stuffing the body completely, then attempting to insert additional filler into the head through a partially closed opening. Once the closing round begins, access becomes nearly impossible. The best practice is to leave the final six to eight stitches of any closure partially open, stuff the cavity fully through that gap, and then close the remaining stitches tightly. For facial features like snouts and noses, insert a small, dense packet of fiberfill directly into the area before the surrounding rounds are completed. This ensures the face retains a firm, dimensional structure.
Assembly Frustrations: Sewing Parts That Never Align
Assembly is where many beginners abandon their first projects. Ears attached at slightly different angles, eyes placed asymmetrically, and legs positioned too far apart can ruin an otherwise well-executed piece. Sewing amigurumi parts together requires patience and a systematic approach.
Before sewing anything permanently, pin or lightly baste each component into place. Use straight pins with colored heads for visibility, or safety pins for temporary attachment. Check symmetry by placing your project on a flat surface and observing it from a distance. Rotate the piece one hundred eighty degrees and compare the visual balance again. Human eyes are remarkably sensitive to asymmetry, and minor adjustments made at the pinning stage prevent major corrections later.
Thread a blunt tapestry needle with yarn matching the part color. Do not use thread intended for embroidery unless it is thick enough to blend invisibly. Work whip stitches through the base edges of components, inserting the needle through existing stitches rather than cutting across them. Pull each stitch snug but not so tight that it distorts the edge. When attaching a limb to the body, anchor the needle at the interior of the piece first, bring it out through the seam line, and work inward from there. This hides knots inside the object.
Eyes and noses present a separate challenge. Plastic safety eyes are the standard choice for amigurumi because they secure firmly and look professional. The washer must be pressed onto the post from the inside of the fabric. If the post is too short for the thickness of your work, the eye will sit loosely and create a gap. In that case, switch to longer posts, embroider the feature with satin stitches instead, or reinforce with a small backup button secured on both sides of the fabric.
Comparing Common Amigurumi Materials
Different materials produce drastically different results, and choosing the right combination is critical for beginners who may not yet understand how properties interact. The following table compares the most common supplies used in amigurumi work and how each affects the final outcome.
| Material | Best For | Pros | Cons |
|---|---|---|---|
| Acrylic yarn, worsted weight | Beginners and budget projects | Affordable, widely available, easy to clean, consistent stitching behavior | Slightly less soft, can shine under bright lighting |
| Cotton yarn, sport or DK weight | Detailed patterns and summer figures | Excellent stitch definition, firm fabric, no fuzz | Stiffer texture, stretches less, harder on hands during long sessions |
| Wool or wool blend yarn | Warmth-themed characters and textured pieces | Natural elasticity helps close gaps slightly, soft hand feel | May felt if washed improperly, more expensive, requires careful cleaning |
| Polyester novelty yarns | Accessories and decorative accents | Unique colors and textures | Poor stitch definition, difficult to sew neatly, unsuitable for main body |
| Poly-fil stuffing (standard) | General-purpose filling | Lightweight, washable, maintains shape over time | Can clump if wetted, may flatten gradually without denser alternatives |
| Glass-bead filling | Weighted paws and bases | Gives stability so figures stand upright | Adds significant weight, requires careful distribution inside fabric |
Choosing the right yarn and stuffing combination reduces problems before they start. A beginner should default to worsted weight acrylic or cotton with standard poly-fil. These pairings are forgiving, widely tested in published patterns, and easy to replace when mistakes happen.
Yarn Choice Missteps That Sabotage Early Projects
Yarn selection influences everything from stitch visibility to ease of assembly. A frequent beginner mistake is selecting a fuzzy, halo-producing yarn for a detailed character. Mohair blends and brushed acrylics create a soft, atmospheric glow that looks beautiful draped on a shelf, but they obscure individual stitches. When your stitches disappear into a cloud of fuzz, you cannot see where each round begins, you cannot reliably count increases, and you cannot assess symmetry accurately.
Solid, plied yarns without heavy texture are far easier to work with for your first several projects. A smooth two-ply or four-ply worsted weight acrylic gives you clear stitch definition, making it significantly easier to spot errors as they occur. As your confidence grows and you master tension and shaping, you can experiment with novelty fibers for decorative accents or secondary characters.
Color selection also matters more than beginners expect. High-contrast colors for facial features make assembly easier. If your animal has black eyes and a pink nose on a brown body, choose yarn shades with enough contrast that the features stand out clearly. Low-contrast combinations like pale gray eyes on white fur require exceptional attention to placement because the details blend into the background.
Another yarn mistake is skipping the gauge check entirely. While amigurumi does not require strict gauge compliance the way wearable items do, knowing your approximate stitch count per inch helps you verify that your tension aligns with the pattern designer's expectations. If your gauge is significantly looser than the pattern, the finished dimensions will be larger and your fabric may be porous. Adjusting hook size after completing your gauge swatch eliminates this discrepancy before you invest time in the full project.
Misreading Abbreviations and Pattern Instructions
Beginner amigurumi patterns assume familiarity with industry-standard abbreviations and construction terminology. If you are new to the craft, certain phrases will not translate intuitively. Terms like sc, inc, dec, hdc, BLO, and FLO appear repeatedly. Even experienced crocheters sometimes stumble over ambiguous instructions such as place the stitch marker in the first stitch of the next round versus place the marker in the last stitch of the current round.
The safest strategy is to create a personal abbreviation reference sheet before starting any pattern. Write out each abbreviation exactly as the pattern uses it alongside a plain-language explanation. Include notes like increase means two single crochets worked into the same stitch and BLO means working only through the back loop of the stitch. Referencing this list while you work prevents costly misinterpretations that compound over multiple rounds.
Patterns vary in style and clarity. Some designers write exceptionally detailed instructions with photos and explanations of each shaping phase. Others provide minimal guidance, assuming intermediate-level knowledge. When you encounter unclear language, do not guess. Search the pattern comments section on the original website or Ravelry forum, watch a video tutorial that references the same technique, or reach out to the designer directly. Guessing is the fastest path to irreversible structural errors.
Another helpful habit is reading through the entire written pattern one more time before you begin crocheting. Note every increase round, every decrease sequence, and every color change. Understanding the overall shape roadmap allows you to anticipate where the project is heading and recognize naturally when something feels off during construction. This forward awareness is what separates troubleshooting from panic.
Building Confidence Through Incremental Practice
Rather than jumping straight into a complex multi-part character, try working small practice shapes first. A simple sphere teaches you how increases and decreases combine to create volume. A flattened oval teaches you how to build legs and arms. A cone teaches you how to shape ears and tails. Practicing these foundational forms on scrap yarn strengthens your muscle memory and builds the mental model you will rely on throughout full projects. You can even combine these small practiced pieces into a miniature animal experiment without the pressure of producing a final product. Mistakes become learning data rather than wasted materials.
When to Restart Versus When to Salvage
Not every flaw requires undoing hours of work. Some errors are cosmetic and can be addressed during assembly or finishing. A slightly loose stitch near the bottom of a limb that will eventually be hidden by a paw pad does not justify frogging the entire leg. A minor asymmetry in eye placement that you notice after sewing can sometimes be adjusted by shifting the eye slightly before the backing washer locks completely in place.
Other errors demand immediate correction. If you discover mid-project that you performed an extra increase in the wrong round, continuing forward will amplify the mistake. The shape will diverge further from the intended design with every subsequent round. In those cases, carefully remove work back to the error point, recount your stitches, and resume correctly. Use a row rasper, a seam ripper designed for crochet, or simply pick out the stitches with your hook. Work methodically, one stitch at a time, to avoid creating new distortions.
Learning to diagnose the severity of an error is a skill developed through experience. Keep a log of your projects documenting what went wrong, how you fixed it, and whether the fix held up over time. This personal reference becomes invaluable as you progress toward more intricate characters.
Final Thoughts on Mastering Beginner Amigurumi Challenges
Crocheting amigurumi animals as a beginner is absolutely achievable when you understand that most failures come from identifiable, correctable causes. Tightening your tension with a smaller hook, tracking rounds meticulously with markers and counters, stuffing strategically with gradual layers, assembling thoughtfully with pinning and testing, choosing appropriate yarns, and reading patterns deliberately are the pillars of early success. Mistakes are not evidence of inability. They are diagnostic feedback pointing you toward the specific adjustment that will elevate your work.
Every expert amigurumi crocheter once produced a lopsided rabbit or a holed bear torso. The difference lies in persistence and willingness to troubleshoot systematically. With practice, observation, and incremental refinement, your creatures will transition from imperfect first attempts to polished, display-worthy characters that reflect genuine skill and creativity.