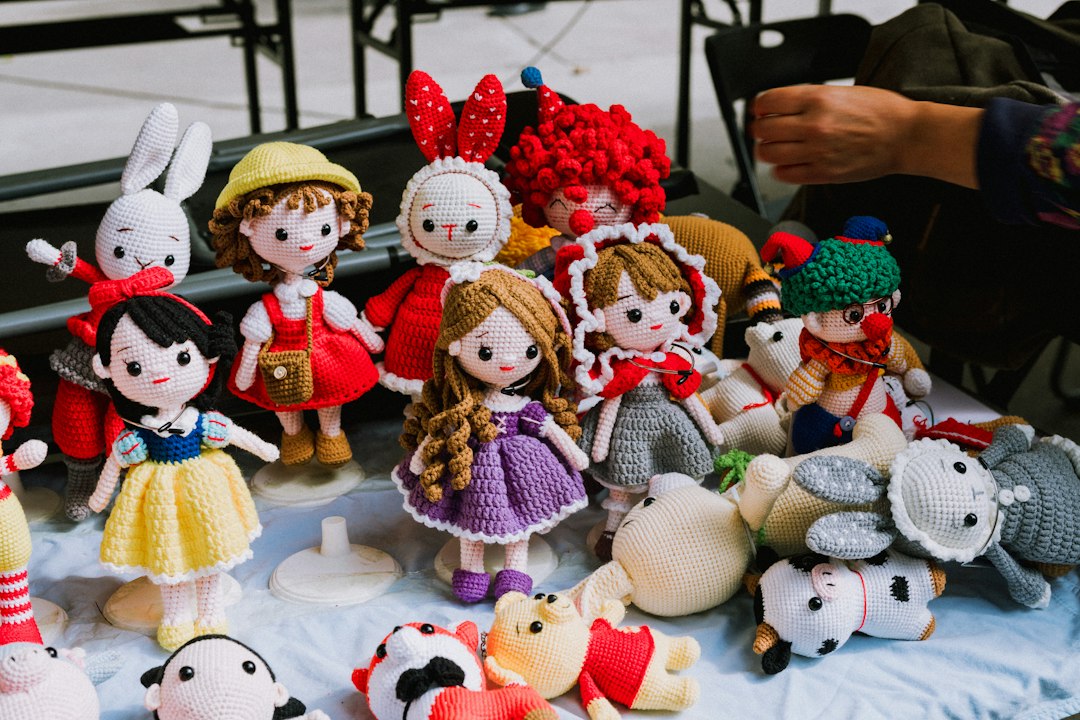
1. Understanding Amigurumi: The Art of Crocheted Stuffed Animals
What is Amigurumi?
Amigurumi is the Japanese art of knitting or crocheting small, stuffed yarn creatures. The term combines "ami" (crocheted or knitted) and "nuigurumi" (stuffed toy). Unlike traditional knitting, amigurumi is almost exclusively worked in the round using single crochet stitches, creating a dense, sturdy fabric that holds stuffing securely. The result is an endless array of cute, huggable animals—from bears and rabbits to fantasy creatures like dragons and octopuses.
Why Crochet Amigurumi Animals?
Crocheting amigurumi offers a unique blend of creative expression and tangible reward. It improves hand-eye coordination, patience, and spatial reasoning. Each finished piece provides a sense of accomplishment, and the projects are highly portable, making them perfect for on-the-go crafting. Furthermore, amigurumi makes wonderful handmade gifts, allowing you to personalize every detail for the recipient.
2. Essential Tools and Materials for Your First Project
Yarn Selection: Best Types for Amigurumi
Choosing the right yarn is the foundation of any successful amigurumi project. The yarn must be tight enough to prevent stuffing from showing through, yet soft enough to be pleasant to handle. Below is a comparison of the most common yarn types used by beginners and experts alike.
| Yarn Type | Pros | Cons | Best For |
|---|---|---|---|
| Acrylic | Affordable, durable, wide color range, machine washable | Can feel plastic-like, less breathable | Beginners, children's toys, practice pieces |
| Cotton | Soft, breathable, stitch definition is excellent, hypoallergenic | Less stretchy, can be heavy, more expensive | Heirloom toys, detailed projects, sensitive skin |
| Wool | Warm, elastic, excellent grip for tight stitches | Can felt if washed improperly, may irritate some | Winter-themed animals, textured stitches |
| Blends (e.g., Acrylic/Cotton) | Balanced durability and softness, often more affordable | May vary in care instructions | All-purpose, balanced projects |
Recommendation for Beginners: Start with a medium-weight (worsted) acrylic yarn. It is forgiving, inexpensive, and comes in every color imaginable. Brands like Red Heart Super Saver, Caron Simply Soft, or Lion Brand Yarns are excellent starting points.
Hook Size and Other Notions
- Hook: A size G/4.00mm or H/5.00mm hook is standard for worsted-weight yarn. Smaller hooks (E/3.50mm) are used for sport or dk weight yarn to create even tighter stitches.
- Stitch Markers: Essential for marking the beginning of rounds, especially when working in the round.
- Safety Eyes and Nose: These are plastic or metal pieces that give your animal personality. Always ensure they are securely fastened and age-appropriate if the toy is for a child.
- Polyester Fiberfill: The standard stuffing material. It is lightweight, washable, and maintains its shape.
- Tapestry Needle: For sewing parts together and weaving in ends.
3. The Beginner's Success Checklist: Step-by-Step Guide
Step 1: Master the Magic Ring
The magic ring (or adjustable loop) is the starting point for almost every amigurumi project. It allows you to pull the starting hole tight closed, eliminating the gap that often appears when starting with a chain stitch.
- Wrap the yarn around your fingers to form a loop.
- Insert the hook into the loop, yarn over, and pull through to create a slip stitch.
- Chain one (this does not count as a stitch).
- Work the required number of single crochets into the loop.
- Pull the tail tight to close the hole.
- Slip stitch to the first single crochet to join the round.
Pro Tip: Practice the magic ring 10 times before starting your first project. Muscle memory is key.
Step 2: Learn the Single Crochet Stitch
Amigurumi is primarily worked in single crochet (sc). This stitch creates a dense, compact fabric.
- Yarn over and pull through the loop on your hook (two loops on hook).
- Yarn over again and pull through both loops (one loop remains).
Work in a continuous spiral, not turning your work after each round. Use a stitch marker to denote the beginning of each round.
Step 3: Increase and Decrease Techniques
To create three-dimensional shapes, you must master increases and decreases.
- Increase (inc): Work two single crochets into the same stitch. This adds a stitch, widening the piece.
- Decrease (dec): Insert hook into the next stitch, yarn over, pull through (two loops on hook). Repeat in the next stitch (three loops on hook). Yarn over and pull through all three loops. This reduces the stitch count, creating curves and shaping.
Example: A basic bear head might start with 6 sc in a magic ring (round 1), then increase every stitch in round 2 (12 sc), increase every other stitch in round 3 (18 sc), and so on.
Step 4: Stuffing and Sewing
Once your animal is nearly complete, it's time to stuff and assemble.
- Stuffing: Start with small amounts of fiberfill, pushing it into the smallest spaces. Avoid overstuffing, which can stretch the yarn and distort the shape. Stuff firmly but gently.
- Sewing: Use a tapestry needle to sew limbs, ears, and muzzle to the body. A whip stitch along the edges creates a seamless join. For a neat finish, hide the yarn tail inside the body.
4. Common Pitfalls and How to Avoid Them
Tension Issues and Solutions
Maintaining consistent tension is the hallmark of a professional-looking amigurumi. If your stitches are too loose, stuffing will peek through; if they're too tight, your hands will fatigue, and the piece will be stiff.
- Solution: Hold the yarn and hook comfortably. The yarn should be taut enough to maintain stitch definition but not so tight that it cuts into your fingers. Practice by crocheting a small swatch and adjusting your grip until it feels natural.
Avoiding the "Holes" Problem
Holes often appear at the beginning of each round or when switching colors.
- Solution: Use the magic ring to close the starting hole. When changing colors, pull the new color through the last two loops of the previous stitch, and always carry the unused yarn up the inside of the piece, trapping it with your stitches.
5. Advanced Strategies & Optimization for Intermediate Crafters
Choosing Complex Patterns
Once you've mastered the basics, challenge yourself with patterns that incorporate color changes, textured stitches (like front-post or back-post single crochet), and movable joints. Patterns that use safety eyes with washers require extra care but add a professional touch.
Adding Details and Embellishments
Elevate your amigurumi by adding embroidered details (whiskers, freckles), small felt pieces (paw pads), or even tiny clothes. Use a finer yarn and a smaller hook for these details to maintain proportion.
6. Final Expert Checklist for How to Crochet Amigurumi Animals for Beginners Success
Pre-Crochet Preparation
- [ ] Read the entire pattern before starting. Highlight any unfamiliar stitches or techniques.
- [ ] Gather all materials: yarn (in all colors), hooks (check pattern for size), stitch markers, safety eyes, fiberfill, tapestry needle, and scissors.
- [ ] Ensure your hook size matches the pattern's recommendation for the chosen yarn weight.
During Crochet
- [ ] Use a stitch marker at the beginning of every round.
- [ ] Count your stitches at the end of each round to catch mistakes early.
- [ ] Keep your tension consistent. If you notice the piece warping, pause and adjust your grip.
- [ ] Stuff as you go, especially for larger animals, to avoid a collapsed structure at the end.
Post-Crochet Finishing
- [ ] Weave in all ends securely. A loose end can unravel hours of work.
- [ ] Sew on facial features before attaching limbs, as this is easier to position.
- [ ] Steam block your finished piece (if using acrylic or cotton) to smooth out any irregularities.
- [ ] Take clear photos of your creation from multiple angles to share online or keep as a record.
7. Conclusion: Your Journey to Amigurumi Mastery
Crocheting amigurumi animals is a rewarding craft that blends precision with creativity. By following this comprehensive checklist—starting with the right materials, mastering foundational stitches, and adhering to a disciplined process—you can transform simple skeins of yarn into cherished, lifelike creatures. Remember, every expert was once a beginner. Embrace mistakes as learning opportunities, and soon you'll be crafting amigurumi that rival professional quality. Happy crocheting!