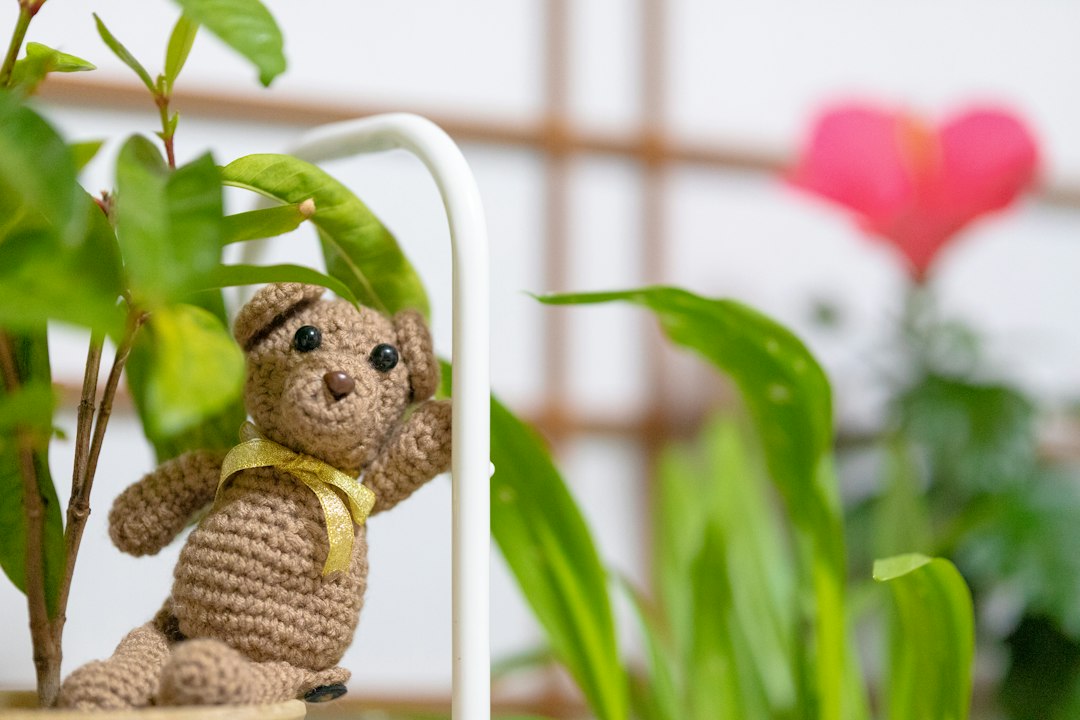
Introduction to the World of Amigurumi
Amigurumi, the Japanese art of knitting or crocheting small, stuffed yarn creatures, has captured the hearts of crafters worldwide. Whether you're a complete novice or an experienced crocheter looking to specialize, this comprehensive mastery roadmap will guide you from your first stitch to creating intricate, lifelike animals. In this article, we'll delve into the essential techniques, progressive projects, and advanced strategies that form the foundation of amigurumi expertise. By following this structured approach, you'll not only learn how to crochet amigurumi animals but also develop the skills to design your own unique creations.
Understanding the Basics of Amigurumi Crochet
Essential Tools and Materials
Before diving into stitches, it's crucial to gather the right tools. The quality of your materials directly impacts the final outcome of your amigurumi. Here's what you'll need:
- Yarn: Opt for medium-weight acrylic or cotton yarn in various colors. These materials are durable, easy to clean, and hold their shape well. Examples include Caron Simply Soft or Lion Brand Yarns Cotton Ease.
- Crochet Hooks: Sizes range from 2.5mm to 4.0mm, depending on your yarn weight. A size G/4.0mm hook is a common starting point for beginners.
- Stitch Markers: Essential for keeping track of rounds in amigurumi, which is typically worked in continuous spirals.
- Safety Eyes and Nose: For adding realistic features to your animals. These come in various sizes and are secured with washers.
- Fiberfill Stuffing: A polyester stuffing that provides firmness and shape to your creations.
- Tapestry Needle: For weaving in ends and sewing parts together.
Investing in quality tools will make the process smoother and more enjoyable. For instance, ergonomic hooks like those from Clover can reduce hand fatigue during long sessions.
Fundamental Stitches for Beginners
Amigurumi primarily uses a few basic stitches. Mastering these is the first step in your roadmap:
- Magic Ring (MR): The starting point for most amigurumi projects. It creates a tight center that can be adjusted.
- Single Crochet (sc): The most common stitch in amigurumi, worked into both loops of the previous row.
- Increase (inc): Adding stitches to expand the shape, such as when creating rounds for the body.
- Decrease (dec): Reducing stitches to narrow the shape, essential for defining limbs and heads.
- Slip Stitch (sl st): Used to join rounds or change colors seamlessly.
Practice these stitches with a simple swatch before starting a project. For example, create a small circle using the magic ring and single crochets to get comfortable with the rhythm.
The Anatomy of Amigurumi Animals
Shaping and Stuffing Techniques
Understanding how to shape amigurumi animals is key to achieving proportional and appealing results. Each part—head, body, limbs—is crocheted separately and then assembled. Here are some techniques:
- Spiral Crocheting: Amigurumi is worked in continuous spirals rather than joined rounds. This requires careful stitch counting to avoid mistakes.
- Color Changes: Change colors at the end of a stitch by pulling the new yarn through the last two loops. This creates clean transitions for features like eyes or patches.
- Stuffing: Begin stuffing when the piece is about two-thirds complete. Use small amounts of fiberfill to maintain shape and avoid over-stuffing, which can distort the fabric.
For a real-world example, when creating a bear, start with the head by increasing stitches in rounds to form a sphere, then decrease to close it off before stuffing and sewing the ears on.
Creating Facial Features and Details
Facial features bring amigurumi to life. Beyond safety eyes, consider these details:
- Embroidery: Use embroidery floss to add mouths, whiskers, or blush with French knots or satin stitches.
- Appliqué: Sew on felt pieces for patches or accessories, like a scarf for a fox.
- Shaping: Use a yarn needle to pull the yarn through the piece and create indentations for cheeks or dimples.
Practice on a simple face first. For instance, stitch a mouth using backstitch to see how it alters the expression.
Beginner-Friendly Projects to Build Skills
Simple Amigurumi Patterns to Start With
Starting with easy patterns helps build confidence. Here are three beginner projects:
- Basic Ball: Crochet a sphere using only single crochets and increases/decreases. This teaches the fundamental shaping techniques.
- Simple Penguin: A flat-bottomed shape with wings and a beak. It introduces color changes and assembly.
- Tiny Bear: A classic amigurumi project that combines all basic stitches and requires stuffing.
These projects are often available as free patterns on platforms like Ravelry or Etsy, providing clear instructions and visual aids.
Common Mistakes and How to Avoid Them
Beginners often encounter pitfalls. Here’s how to navigate them:
- Losing Track of Rounds: Use stitch markers to denote the beginning of each round. This prevents the spiral from shifting.
- Incorrect Tension: Crocheting too tightly can make the fabric stiff. Relax your hands and adjust as needed.
- Improper Stuffing: Over-stuffing can cause seams to burst. Stuff gradually and use a stuffing tool for precision.
For example, if your amigurumi looks lopsided, it might be due to uneven increases. Count stitches regularly to ensure symmetry.
Intermediate Techniques for Advanced Creations
Color Changes and Gradient Techniques
As you progress, color work adds depth. Techniques include:
- Striped Patterns: Change colors every few rows by carrying the unused yarn along the inside. This avoids cutting yarn frequently.
- Gradient Yarn: Use variegated yarn for a smooth color transition, ideal for animals like rainbow-themed creatures.
- Intarsia: For larger color blocks, wind yarn onto bobbins to prevent tangling.
When changing colors, always do so in the last stitch of the row for a clean edge. Practice with a simple two-color ball to see the effect.
Adding Texture and Embellishments
Texture makes amigurumi more engaging. Try:
- Bullion Stitches: Create fluffy elements like fur or manes by wrapping yarn multiple times around the hook.
- Surface Crochet: Add details like spots or stripes after the main piece is complete.
- Non-Sewing Attachments: Use slip stitches to attach limbs directly to the body, reducing assembly time.
For a textured hedgehog, use bullion stitches for spines and French knots for eyes, creating a tactile experience.
Advanced Strategies and Optimization
Efficient Crochet Methods for Large Projects
For larger animals, efficiency is key. Strategies include:
- Working in the Round: Use the magic ring to start and maintain consistent tension.
- Using a Larger Hook: For bulkier yarn, a larger hook speeds up the process without sacrificing structure.
- Batch Processing: Crochet multiple parts at once, such as four legs, to save time and maintain consistency.
For example, when making a large elephant, crochet the body in one piece rather than assembling smaller sections, reducing seams.
Troubleshooting and Problem-Solving
Even experienced crocheters face issues. Here’s how to troubleshoot:
- Holes in Stitches: Often caused by loose tension or missing stitches. Go back and reinforce the area.
- Uneven Edges: Check for skipped increases or decreases. Use a ruler to measure symmetry.
- Yarn Breakage: Switch to a stronger yarn or adjust hook size to reduce stress on the fiber.
Keep a notebook to track patterns and modifications. This becomes invaluable for custom designs.
The Mastery Roadmap: From Beginner to Expert
Setting Goals and Tracking Progress
A roadmap requires milestones. Set SMART goals (Specific, Measurable, Achievable, Relevant, Time-bound):
- Week 1-2: Master basic stitches and create a simple ball.
- Month 1: Complete a beginner pattern like a penguin.
- Month 3: Tackle an intermediate project with color changes.
- Month 6: Design your first original amigurumi animal.
Use a progress journal to note challenges and successes. Join online communities like the Amigurumi subreddit for feedback and inspiration.
Resources for Continued Learning and Inspiration
To sustain growth, leverage these resources:
- Books: "Amigurumi World" by Ana Paula Rimoli offers diverse patterns and techniques.
- Online Tutorials: YouTube channels like "Amigurumi Today" provide step-by-step videos.
- Forums: Ravelry's amigurumi group is a hub for pattern sharing and advice.
Attend local crochet meetups or workshops to learn from experts. For instance, a class on advanced shaping can unlock new possibilities.
Comparison Table: Yarn Types for Amigurumi
| Yarn Type | Best For | Pros | Cons | Example Brand |
|---|---|---|---|---|
| Acrylic | Beginners, durability | Affordable, easy care, wide color range | Can pill over time | Caron Simply Soft |
| Cotton | Detail work, summer projects | Stitches show clearly, breathable | Less stretchy, can be harsh | Lily Sugar'n Cream |
| Wool | Warmth, texture | Elastic, holds shape well | Not machine washable, may irritate | Lion Brand Wool-Ease |
| Blends | Balance of qualities | Combines benefits, e.g., acrylic-wool | Can be pricier | Bernat Premium |
This table helps you choose the right yarn based on your project needs. For instance, acrylic is ideal for practice, while cotton is perfect for detailed facial features.
Frequently Asked Questions
Q: What is the best yarn for amigurumi beginners?
A: Acrylic yarn is highly recommended for beginners due to its affordability, durability, and ease of care. It's forgiving of mistakes and available in a wide range of colors. Start with a medium-weight acrylic like Caron Simply Soft to build confidence.
Q: How do I start amigurumi for absolute beginners?
A: Begin with the magic ring and single crochet stitch. Follow a simple pattern for a basic ball or sphere. Use stitch markers to keep track of rounds, and practice consistent tension. Free patterns on websites like AllFreeCrochet.com are great for starting out.
Q: What are the most common stitches used in amigurumi?
A: The core stitches are single crochet, increase, decrease, and slip stitch. The magic ring is the foundation. Mastering these allows you to create most amigurumi shapes. Advanced stitches like half-double crochet can add variety but are not essential for beginners.
Q: How can I improve my amigurumi skills quickly?
A: Practice regularly with progressively challenging projects. Join a community for feedback, and watch tutorial videos to see techniques in action. Keep a journal of your work to identify areas for improvement. Additionally, experiment with different yarns and hooks to understand how materials affect the outcome.