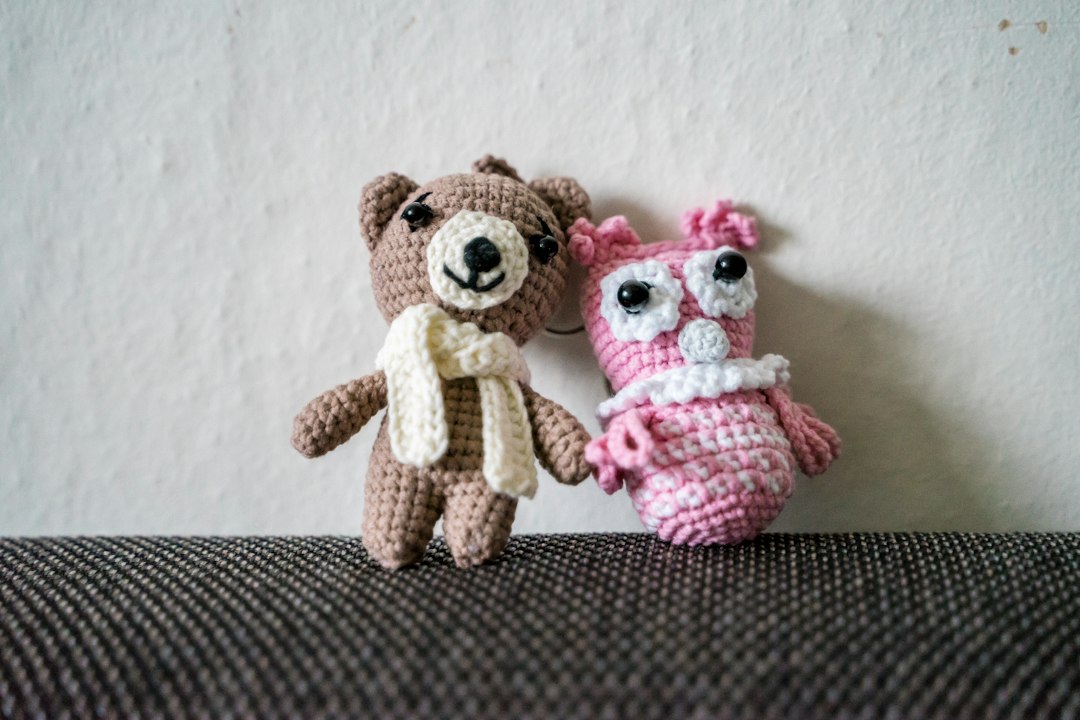
Introduction to the Art of Amigurumi
Amigurumi, the Japanese art of knitting or crocheting small, stuffed yarn creatures, has captured the hearts of crafters worldwide. For beginners, the allure of creating adorable, tangible animals from a simple ball of yarn is incredibly satisfying. However, the path to successful amigurumi requires an understanding of its unique key features and the right equipment. This comprehensive guide delves into the essential techniques, tools, and buyer considerations that will transform your first crocheting attempts into professional-looking plush companions.
Unlike standard crochet projects, amigurumi demands precision, specific stitches, and a focus on three-dimensional shaping. The key features that define this craft are not merely stitches but the methods used to create seamless, stuffed figures. By mastering these foundational elements, you will build the confidence needed to tackle increasingly complex patterns, from simple balls to detailed animals with limbs, ears, and expressive faces.
Key Features of Amigurumi Crochet for Beginners
Before selecting your first set of tools, it is crucial to understand the core techniques that distinguish amigurumi from other crochet styles. These key features form the backbone of every successful project and will guide your practice sessions.
1. The Magic Ring (or Magic Circle)
The magic ring is the starting point for almost all amigurumi animals. It creates a flexible, adjustable center that can be pulled tight to close the hole completely, eliminating the common issue of a gap at the beginning of a round. Beginners often struggle with standard chain loops, which can leave unsightly holes. The magic ring allows you to place the initial stitches over a loop of yarn, which you then tighten by pulling the tail.
Actionable Tip: Practice the magic ring by creating a loop, inserting your hook, pulling up a loop, and chaining one. Work your first round of single crochets over both the loop and the tail, then gently pull the tail to close the center.
2. The Single Crochet Stitch (sc)
While many crochet projects utilize a variety of stitches, amigurumi relies almost exclusively on the single crochet (sc) stitch. This stitch creates a dense, tight fabric that prevents the stuffing from showing through and gives the plush toy its characteristic firm texture. Mastering the single crochet in the back loops only (BLO) or front loops only (FLO) can add texture and define body parts, such as the ridges on a turtle's shell or the texture of a bear's fur.
Actionable Tip: Maintain consistent tension. Amigurumi requires a snug stitch to avoid gaps. If your stitches are too loose, your toy will appear floppy and the stuffing will be visible.
3. Increase and Decrease Techniques
Shaping a flat circle into a three-dimensional animal requires strategic increases (adding stitches) and decreases (reducing stitches). Increases are worked as two single crochets into the same stitch, which widens the piece. Decreases, often worked as a single crochet two stitches together (sc2tog), narrow the fabric. The placement of these stitches is critical for creating ears, snouts, and limbs.
Actionable Tip: Always follow the pattern's stitch marker placement meticulously. Misplacing an increase or decrease can lead to asymmetrical features, which is common in beginner projects but easily avoidable with careful attention.
4. Stuffing and Assembly
The final key feature of amigurumi is bringing the separate parts together. This involves stuffing the body and limbs with a polyester fiberfill to achieve the desired firmness and shape. Overstuffing can cause the yarn to stretch and distort the stitches, while understuffing results in a limp, unappealing creature. Assembly requires a tapestry needle to sew limbs, ears, and tails securely to the body, ensuring they are positioned symmetrically.
Actionable Tip: Stuff your toy in small increments, pushing the fiberfill into every crevice. Use a long, blunt tapestry needle to sew parts together, making small, secure stitches that won't be visible from the outside.
Essential Equipment and Tools for Amigurumi
Having the right tools is just as important as mastering the techniques. The correct equipment enhances your crocheting experience, reduces hand fatigue, and improves the final product's quality.
Yarn Selection
The choice of yarn significantly impacts the appearance and durability of your amigurumi. For beginners, acrylic yarn is the undisputed champion. It is affordable, widely available, durable, and easy to care for, which is essential for toys that may be handled frequently. Look for a medium weight (worsted/size 4) yarn, as it is thick enough to work up quickly but not so bulky that it becomes unmanageable. Solid colors or variegated yarns with short color changes work best, as long, slow color changes can obscure stitch definition.
Key Feature to Look For: A soft, plied yarn with a slight "grip" to prevent the stitches from sliding around. Avoid novelty yarns like eyelash or tinsel, which make it difficult to see your stitches.
Crochet Hooks
Your crochet hook is your primary tool, and its size directly affects your gauge and the overall size of your project. For worsted weight yarn, a 3.5mm (E) to 4.5mm (G) hook is standard for amigurumi. A hook that is too large will create loose stitches that allow stuffing to show; a hook that is too small will cause hand strain and make the project take longer.
Key Feature to Look For: An ergonomic hook with a comfortable handle. Brands like Clover Amour or Susan Bates offer hooks with soft, rubberized grips that reduce fatigue during long crocheting sessions. The hook itself should have a smooth, tapered point to easily pierce the yarn without splitting it.
Safety Eyes and Stuffing
Safety eyes are the defining feature of many amigurumi animals, giving them a lifelike expression. These are plastic or metal eyes with a peg on the back that is secured with a washer. They are called "safety" eyes because they are designed to lock in place, making them difficult for a child to remove, though they are not a substitute for proper toy safety standards.
Key Feature to Look For: High-quality safety eyes made from durable, non-toxic plastic. They should have a smooth back peg and a secure washer. For a professional finish, invest in a set of locking stitch markers to mark the beginning of each round and increases, which is vital for maintaining stitch count.
Additional Tools
- Tapestry Needle: A blunt, large-eyed needle for sewing parts together and weaving in yarn ends.
- Stitch Markers: Essential for marking the start of a round and specific stitches for increases/decreases.
- Scissors: Sharp, small scissors for cutting yarn.
- Row Counter: A simple counter that clips to your hook to keep track of rounds, especially useful for longer patterns.
Buyer's Guide: How to Choose the Right Amigurumi Tools
Navigating the vast array of available tools can be overwhelming for a beginner. This buyer's guide focuses on the key features to look for when purchasing essential equipment, ensuring you get the best value for your investment.
When purchasing a crochet hook, consider the material. Aluminum hooks are lightweight and smooth but can be slippery. Bamboo hooks offer a natural grip but may catch on certain yarns. Ergonomic handles are worth the investment if you plan to crochet regularly, as they prevent hand cramps.
For yarn, always check the label for the recommended hook size and care instructions. A yarn that is machine washable is ideal for toys that may need cleaning. Buying a small skein of several different colors to start is more cost-effective than large quantities until you know your preferences.
Comparison Table: Recommended Amigurumi Tools for Beginners
| Tool Category | Recommended Product Example | Key Features | Price Range (USD) | Ideal For |
|---|---|---|---|---|
| Crochet Hook | Clover Amour 4.0mm | Soft rubber grip, smooth aluminum hook, color-coded | $8-$12 | Beginners seeking comfort and precision |
| Yarn | Caron Simply Soft 4-ply Acrylic | Soft, vibrant colors, worsted weight, machine washable | $4-$6 per skein | First-time projects and color variety |
| Safety Eyes | Tulip 12mm Safety Eyes | Durable plastic, secure washer, wide color range | $5-$8 per set | Creating expressive animal faces |
| Stitch Markers | Clover Locking Stitch Markers | Easy to clip on/off, bright colors, won't snag yarn | $4-$6 per pack | Maintaining accurate stitch counts |
| Tapestry Needle | Susan Bates Blunt-End Needle | Blunt tip to avoid splitting yarn, multiple sizes | $2-$4 per needle | Seamless assembly of toy parts |
Step-by-Step Guide to Your First Amigurumi Animal
With your tools selected and techniques understood, it's time to begin your first project. We will outline the general process for creating a simple ball-shaped animal, such as a hamster or a bear.
- Choose a Simple Pattern: Start with a pattern that only uses the magic ring, single crochet, increases, and decreases. A basic ball shape with ears is a perfect first project.
- Create the Magic Ring: Begin your pattern by making a magic ring. This is the foundation of your toy.
- Work in Spiral Rounds: Amigurumi is typically worked in continuous spirals, not joined rounds. Use a stitch marker to denote the beginning of each round to avoid losing your place.
- Follow the Increase Pattern: The first few rounds will involve increasing stitches to create a flat circle. For example, Round 1: 6 sc in the magic ring. Round 2: 2 sc in each stitch around (12 stitches).
- Shape the Body: After reaching the desired width, you will work even (without increasing or decreasing) for several rounds to create the body's height. Then, you will begin decreasing to close the top.
- Stuff the Toy: Once the opening is small enough, begin stuffing the toy firmly with polyester fiberfill. Continue until it is full and plump.
- Finish and Weave In Ends: Pull the yarn tail through the remaining stitches, tighten to close the hole, and weave the end into the inside of the toy with your tapestry needle.
- Attach Features: Sew on ears, limbs, and attach safety eyes according to the pattern's placement guide.
Common Mistakes and How to Avoid Them
Beginners often encounter a few common pitfalls. The most frequent issue is a visible hole at the beginning of the project. This is easily avoided by mastering the magic ring and pulling the tail tightly after the first round. Another common error is inconsistent stitch tension, which leads to an uneven shape. Practice your single crochet until the rhythm feels natural. Finally, miscounting stitches is a major cause of frustration. Always place a stitch marker at the beginning of each round and count your stitches at the end of the round to ensure accuracy.
Advanced Tips for Progressing Beyond Beginners
Once you are comfortable with the basic ball shape, you can start to explore more complex features. Learning to crochet in the back loop only (BLO) can create a textured "foot" for your animal. Experimenting with color changes can add stripes or patches. For more advanced projects, you might learn to crochet attached limbs as you go, rather than sewing them on later, which creates a stronger, more seamless toy.
Conclusion
Crocheting amigurumi animals is a deeply rewarding craft that combines technical skill with creative expression. By focusing on the key features—mastering the magic ring, perfecting the single crochet, understanding increases and decreases, and learning proper stuffing and assembly techniques—you lay a solid foundation for success. Coupled with the right equipment, chosen for comfort and quality, your journey from beginner to confident amigurumi maker will be filled with joy and adorable creations. Start with the basics, practice diligently, and soon you'll be crafting a whole menagerie of charming yarn animals.